Basic Knowledge
Some basic but very important steps you must know before working with Blogger and this template
- Install Blogger Template
- IMPORTANTManage your site using Sneeit Spot
- Get and Import Dummy Content
- Enable Mobile Template
- Enable Search Preference for Better SEO
- Upload Site Logo
- Upload Favicon Image
- Work with Blogger Template Designer Tool
Activating the Theme
- Login to Sneeit using Envato Account
- Access the "Sneeit Licenses" tab in your Sneeit account to generate a license.
- Add Sneeit Spot into your Chrome (if did not)
- Access your blog dashboard, then select Sneeit Spot / Options / Keys and API and input your generated key for your site
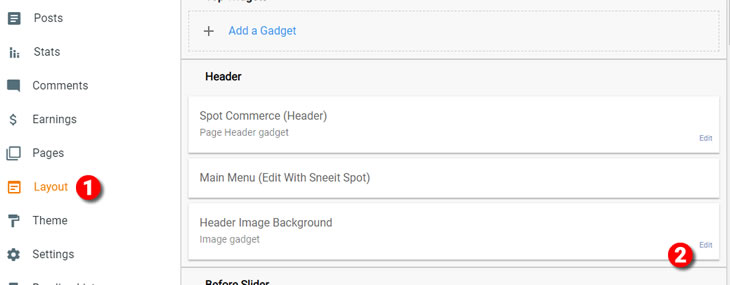
Adding Slider Background
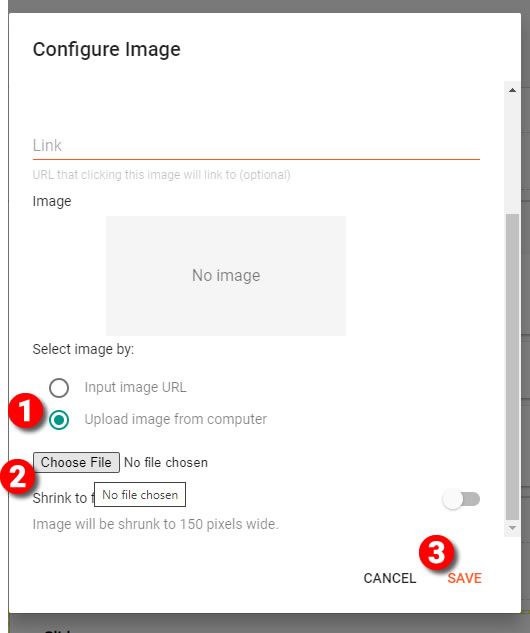
In Configure Image window, click Choose File to upload your background image for slider section. We included a sample image in your download package at path: SpotCommerce-testing-dataimagesslider-background.jpg
After uploading, click Save to apply.
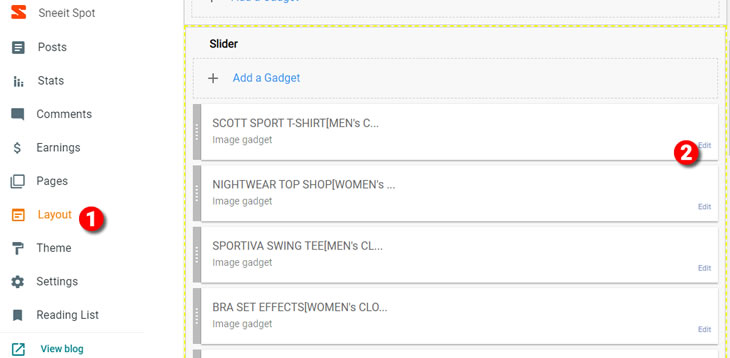
Working with Slider
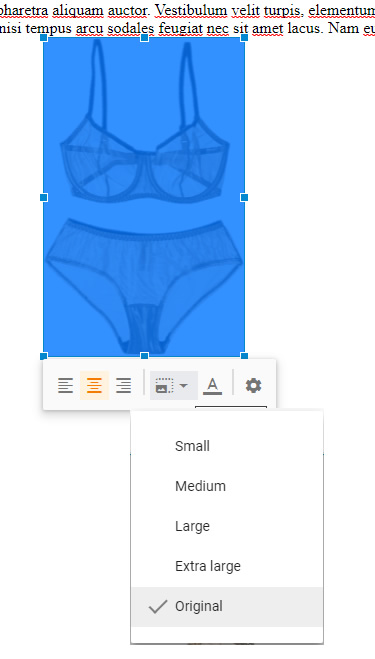
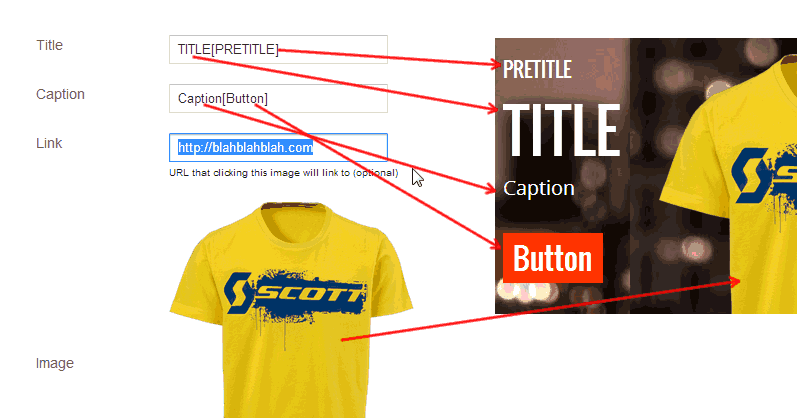
When editing any Image widgets in this section, just input the Title, Caption, and Link and click Choose File to upload an image for your Image widget. The below image shows the relation between the title format and the real display.
Horizontal Section
For example, with the home icon, you will see its code is fa-map-maker, so the text that you will input to content is ##map-makert##
<b>##map-marker##BLOGGERCANDO, 01 ST, VIETNAM</b><br/><br/>
<b>##phone##+0849188039383</b><br/><br/>
<b>##paper-plane-o##[email protected]</b><br/><br/>

<br/>
There are many variations of passages of Lorem Ipsum available, but the majority have suffered alteration in some form, by injected humour, or randomised words which don't look even slightly believable.

<br/><br/>
If you are going to use a passage of Lorem Ipsum, you need to be sure there isn't anything embarrassing hidden in the middle of text.
Subscribe Form
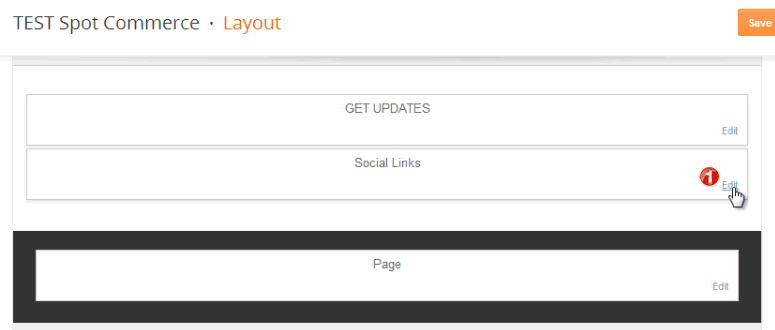
Add Social Icons
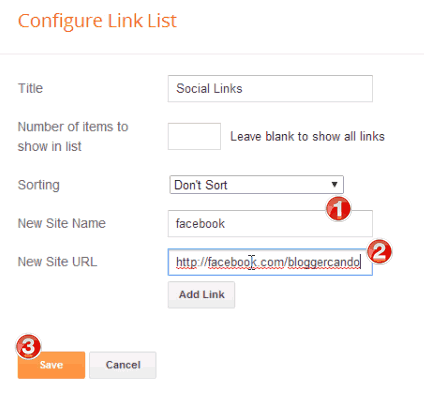
Input the social icon code into New Site Name field and your social link into New Site URL field, then click Add Link. Do the same steps for each social link that you want to add. You can find social codes at: http://fortawesome.github.io/Font-Awesome/icons/#brand
For example, the Facebook icon code is fa-facebook, so you need to input facebook into New Site Name field.
Adding New Products
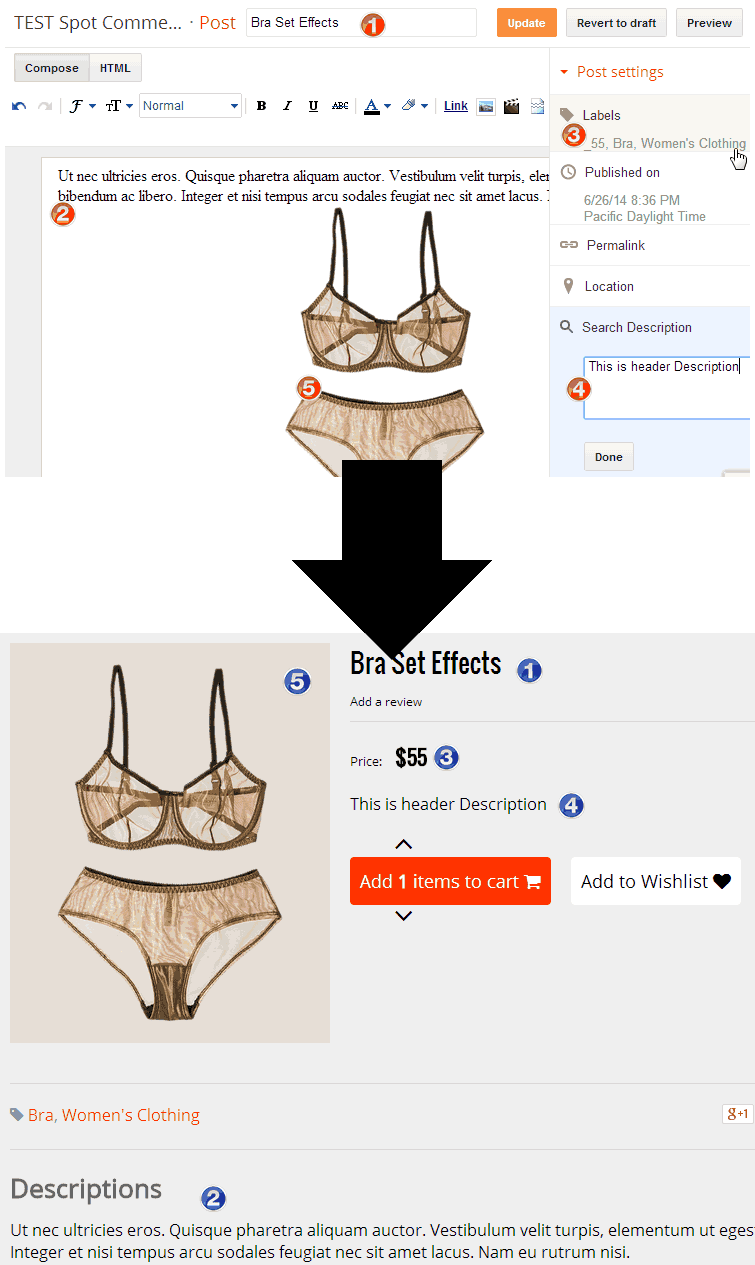
Note: to keep your image not going to the slider, you can input [stay] in the image alt or title.
The below figure shows the relation between the label you input for your posts and what will show on the template.
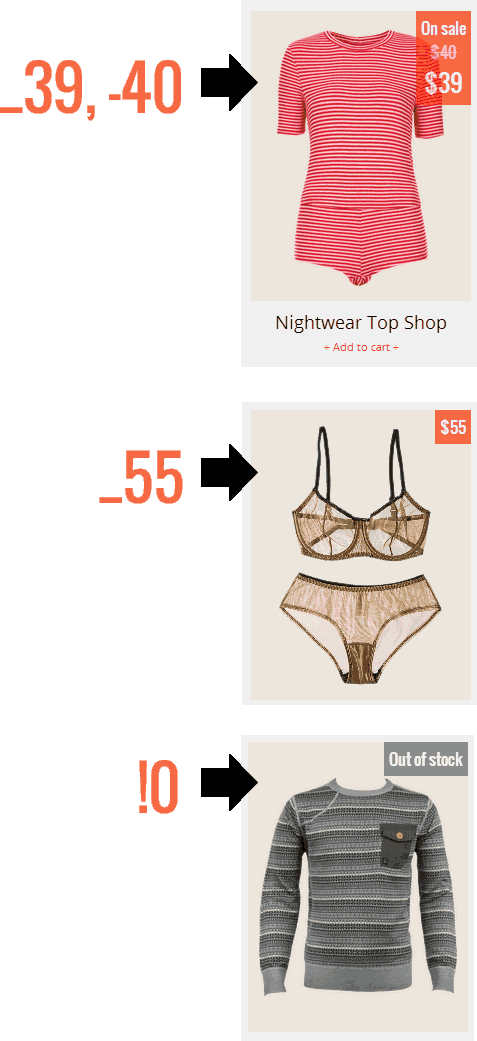
- Input labels: _39, -40 mean you want to make this product has a current price is 39 (USD or other depending on your currency setting) and the old price is 40. This product will show as On Sale on the template.
- Input label: _55 only, meaning you want to make this product has a current price is 55.
- Input label: !0 means you want to make this product is Out of stock.
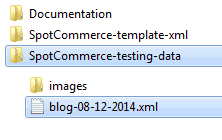
Importing Testing Data
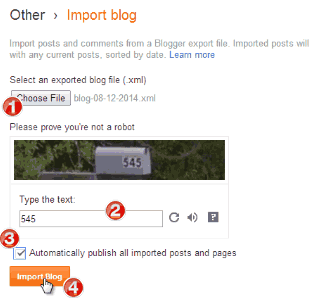
In pop-out window, click Choose File to upload your blog data. We included one example of data in your download package at path: SpotCommerce-testing-datablog-08-12-2014.xml
After uploading, just input the captcha number and opt in for the option "Automatically publish all imported posts and pages" then click Import Blog to finish.
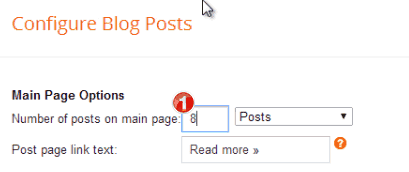
Blog Widget Settings
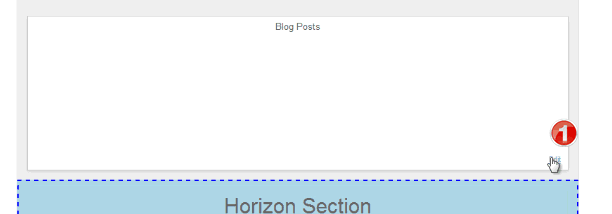
In Configure Blog Posts window, input the Number of posts on main page value by 8 and click the Save button to apply.
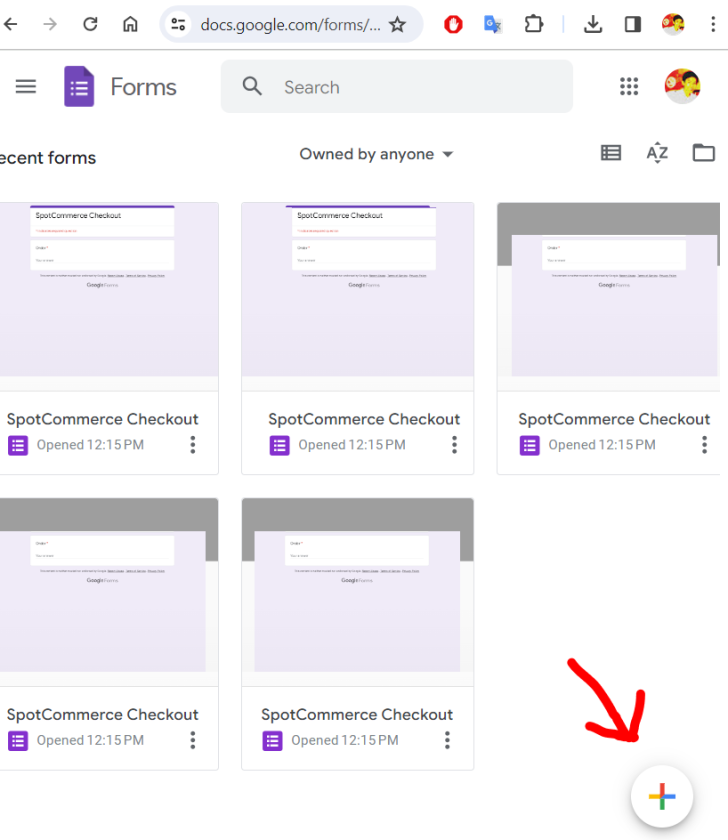
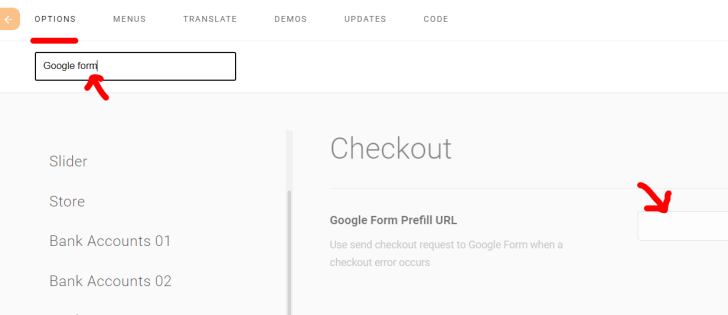
Google Form Checkout
You can create a Google Form and use its prefill link as a backup in case the Blogger contact form gets errors when users check out.
Access https://docs.google.com/forms/ and create a new form by clicking the "+" button at the bottom right corner.
Create a field with the name Order (or any name you want) with the type "Paragraph" (important). Then click the ellipses menu and choose "Get pre-filled link"
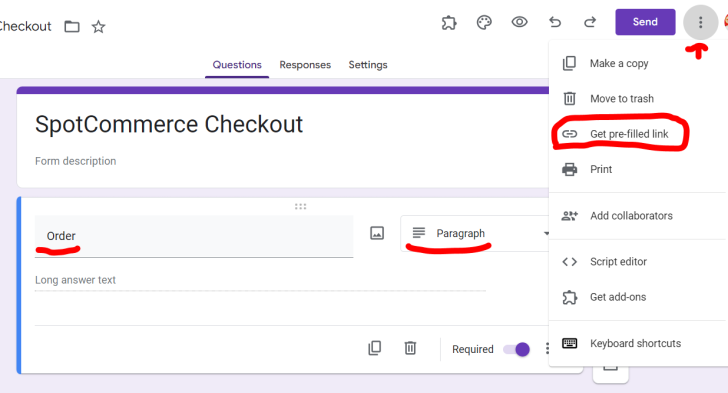
In the pre-fill window, input "Order" to the answer of the Order field, click "Get Link" and then COPY LINK.

In the Sneeit Spot > Options, search Google Form and input the link you copied into Google Form Prefill URL, then Save your template.
Frequently Asked Questions (FAQ)
My blog is showing blur images