Digital Ocean is an awesome VPS hosting that I am also using to host my demo websites for my business with ThemeForest. In this article, I will show you a very easy way to install Nginx for WordPress on Digital Ocean VPS Hosting with Centminmod Script from A to Z.
Step 1 – Create a droplet
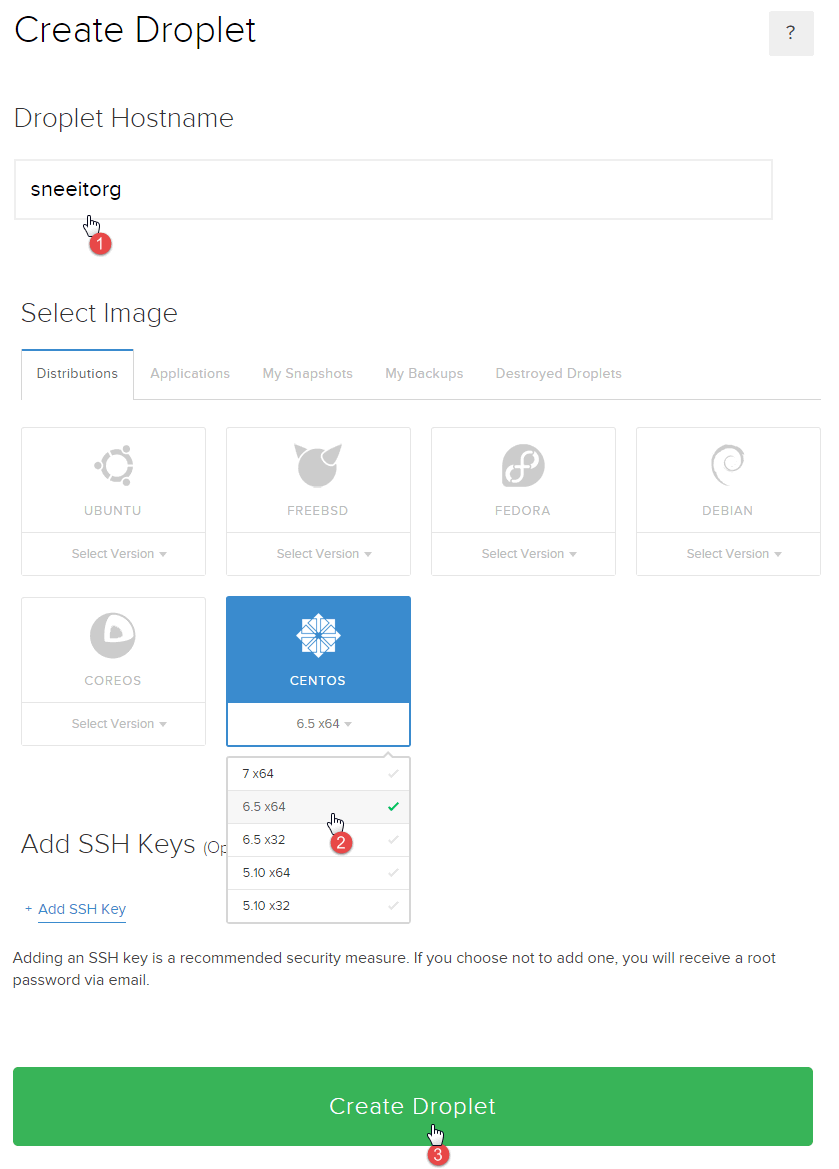
Login to your Digital Ocean dashboard and click Create Droplet button (or you can also access https://cloud.digitalocean.com/droplets/new)
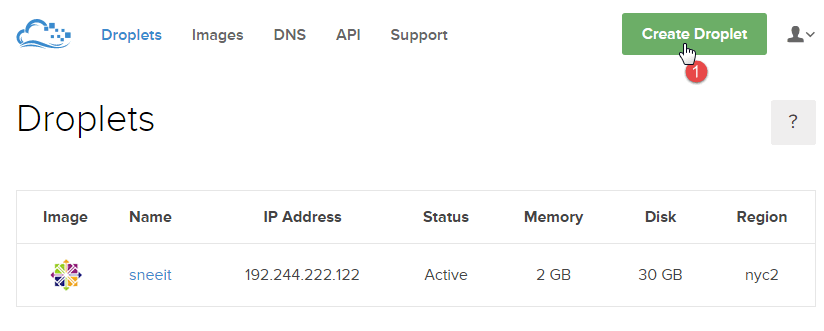
In Create Droplet page, input your Droplet Hostname (in this example, I inputted sneeitorg). In Select Image section, choose CENTOS 6.5 x64. (Recommend Size is $10/mo or higher, Region is Newyork)
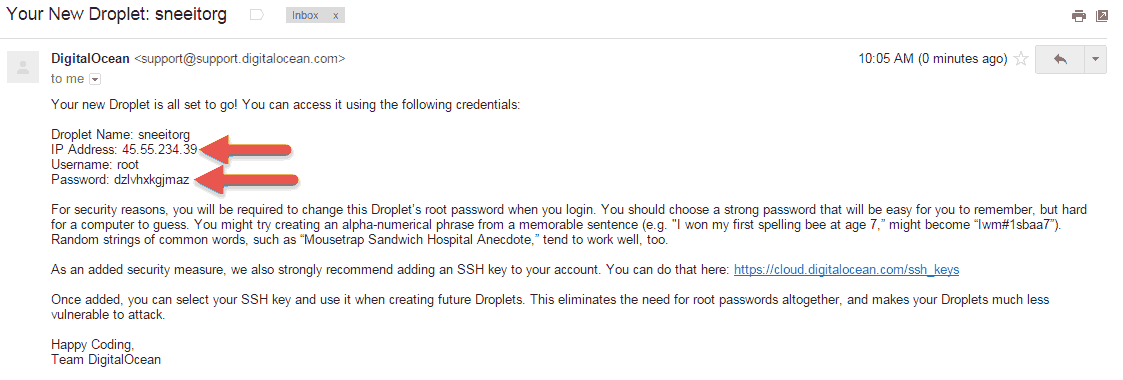
Congratulation! You created a droplet successfully. Now, you must receive an email with droplet information (the email that you used to sign up Digital Ocean). In this email, please remember your droplet IP Address and Password, we will use them in step 3.
Step 2 – Target Your Domain to The Droplet
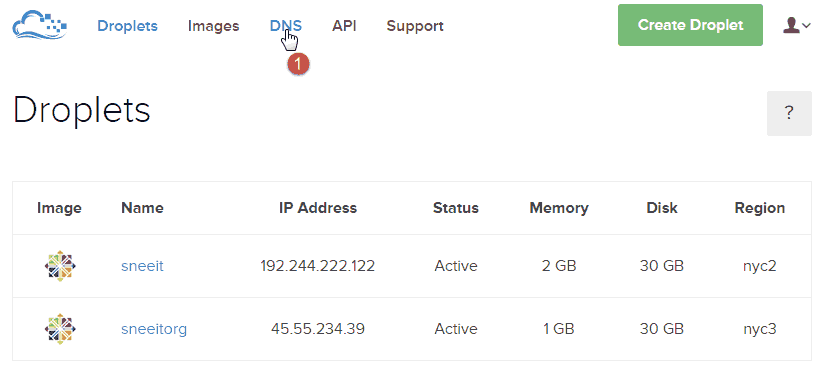
Return back your Digital Ocean dashboard, you will see your new droplet there. Click DNS menu (or access https://cloud.digitalocean.com/domains).

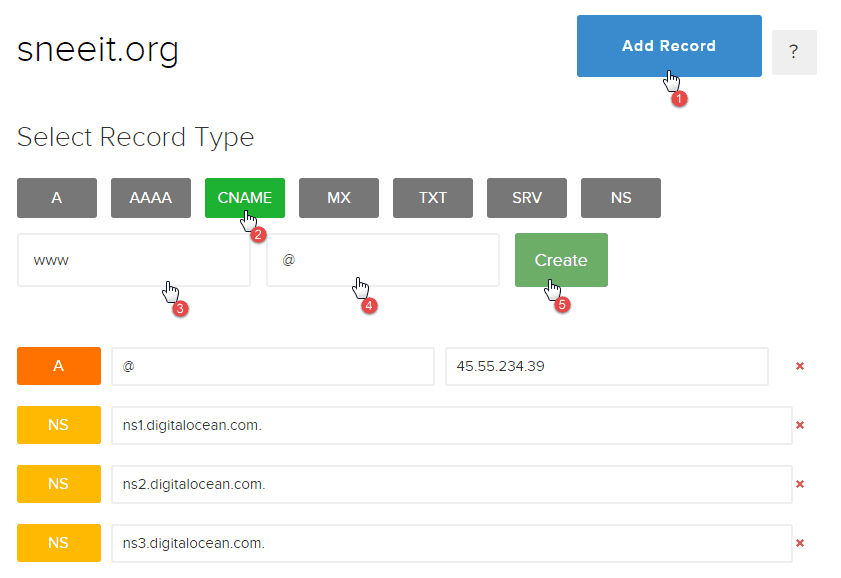
After that, login to the dashboard of your domain registrar. I am using Godaddy, but other registrars (like Namecheap) will also have the same interface. Then click Manage your Nameservers
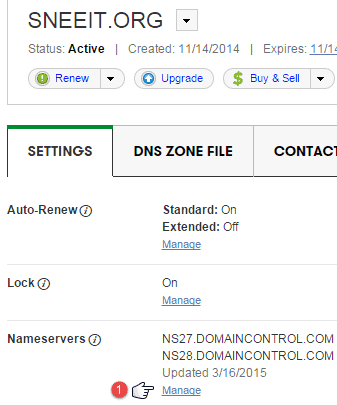
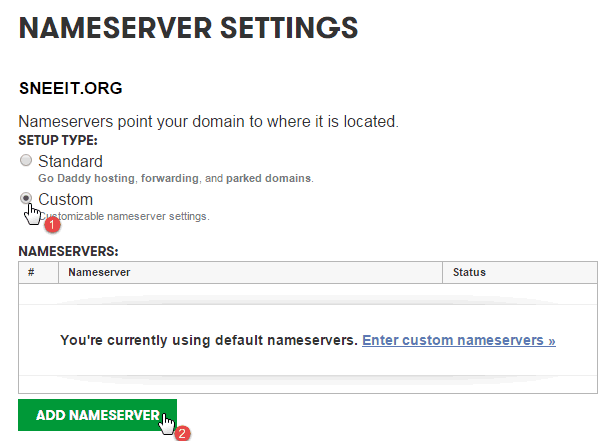
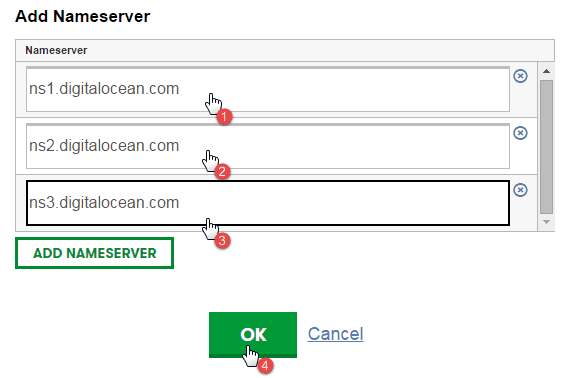
Step 3 – Install Nginx and WordPress
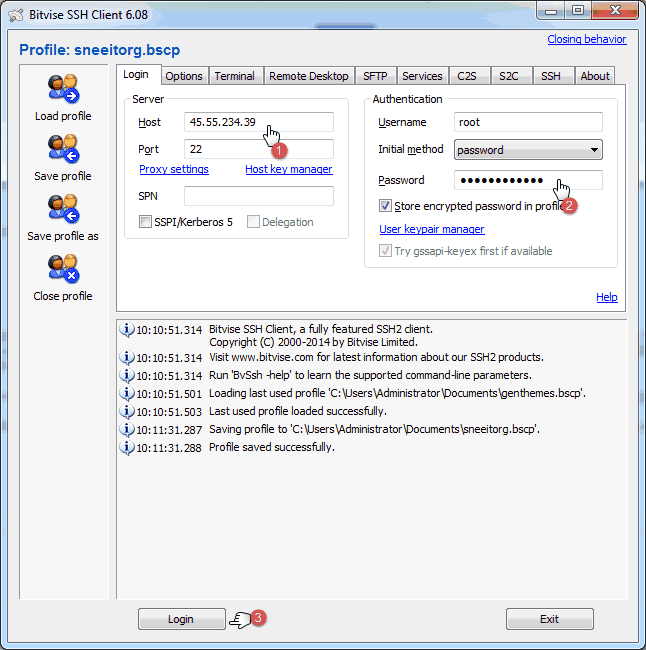
Now, you will see Bitvise Xterm (a SSH terminal). Just input your droplet password and then input your new password for the droplet twice (please remember your new password to login next time with Bitvise).
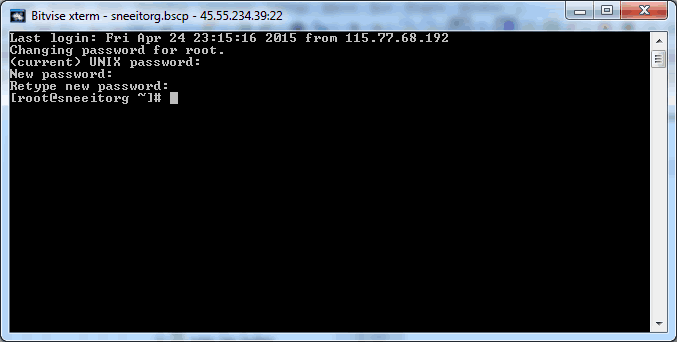
Copy and paste whole below code (include the blank line at the end) to the terminal. But before copy and paste the code, please notice all texts “centmin-v1.2.3-eva2000.07” that can be changed depend on the latest stable version of Centminmod script. Please check Centminmod change log, if the version is higher, just replace all texts with a right version text.
yum install wget unzip zip -y
cd /usr/local/src
wget https://centminmod.com/download/centmin-v1.2.3-eva2000.07.zip
unzip centmin-v1.2.3-eva2000.07.zip
cd centmin-v1.2.3mod
chmod +x centmin.sh
yum -y install bc wget yum-plugin-fastestmirror
yum clean all
cd /usr/local/src/centmin-v1.2.3mod
./centmin.sh
After pasted code, in next 2 mins, you will see Centmin menu like the below:
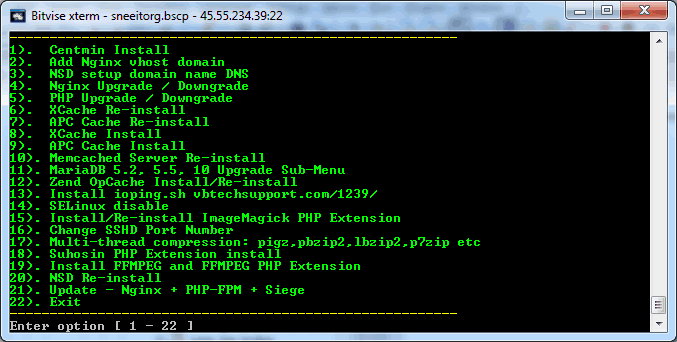
Now, just input 1 and press Enter to install Centmin. This will take about 20-45 mins.
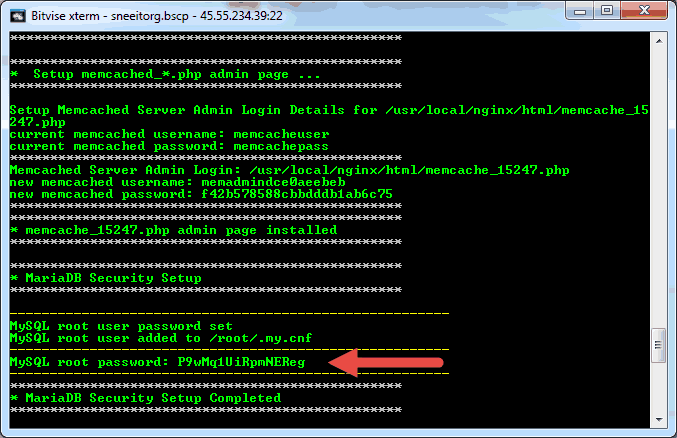
After finished, scroll up a bit, you will see some green lines like below image. Those lines are very important information that you need to copy and save into a text file to use later (special SQL root password).
Now, paste mysql -u root -p into your terminal and press Enter to access MariaDB. Server will ask you the password, just input the MySQL root password that you get from the green lines above.
In MariaDB, copy and paste the whole below code to your terminal. This code will help you creating Database for your WordPress site. But before copy and paste, please notice that you need to change the database_name, your_db_username and your_user_password in the code as you want (and please remember them).
CREATE DATABASE database_name;
CREATE USER your_db_username@localhost;
SET PASSWORD FOR your_db_username@localhost= PASSWORD("your_user_password");
GRANT ALL PRIVILEGES ON database_name.* TO your_db_username@localhost IDENTIFIED BY 'your_user_password';
FLUSH PRIVILEGES;
exit;
Now, we need to add your domain to nginx. Copy and paste the below code to the terminal:
cd /usr/local/src/centmin-v1.2.3mod
./centmin.sh
Then type 2 and add your domain (without www) and press Enter. After that, type 22 and Enter to exit.
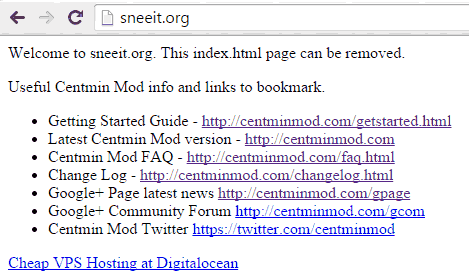
Ok, now you can open your browser and access your domain name. If you see a thing like below, that’s mean all are OK.
Alright, next, we need to install WordPress. Copy and paste the whole below code to your terminal (before copy and paste, replace sneeit.org with your domain name)
cd /home/nginx/domains/sneeit.org/public
wget https://wordpress.org/latest.tar.gz
tar -xvf latest.tar.gz
mv wordpress/* .
chown -R nginx:nginx /home/nginx/domains/
rm -rf wordpress
rm -rf latest.tar.gz
And then input below code (but before input, please replace sneeit.org to your domain name)
cd /usr/local/nginx/conf/conf.d
nano sneeit.org.conf
In Vim editor, go around and you will see a code like below:
#try_files $uri $uri/ /index.php;
Change it to
try_files $uri $uri/ /index.php?$args;
Then press Ctrl+O and Enter to save. This step will allow you use permalink for your WordPress site.
Finally – Setup your WordPress site
This is basic step but I still write about it for beginners. Access your domain name in your browser, select your language and click Continue.
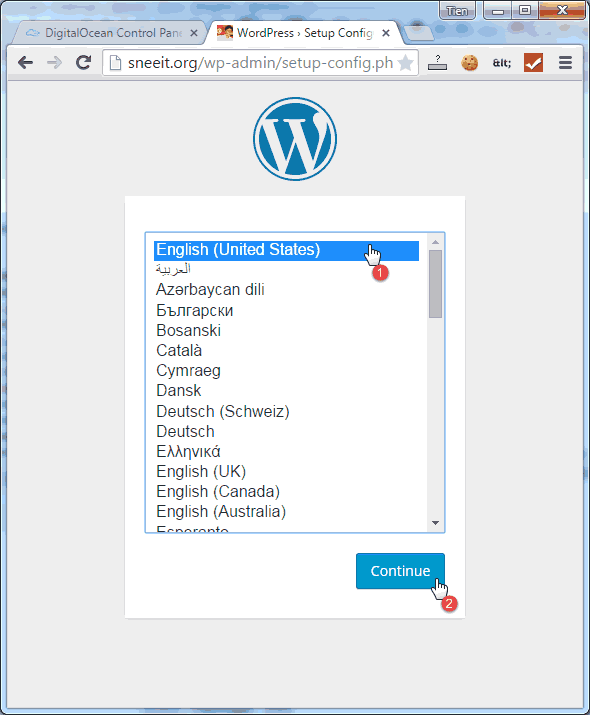
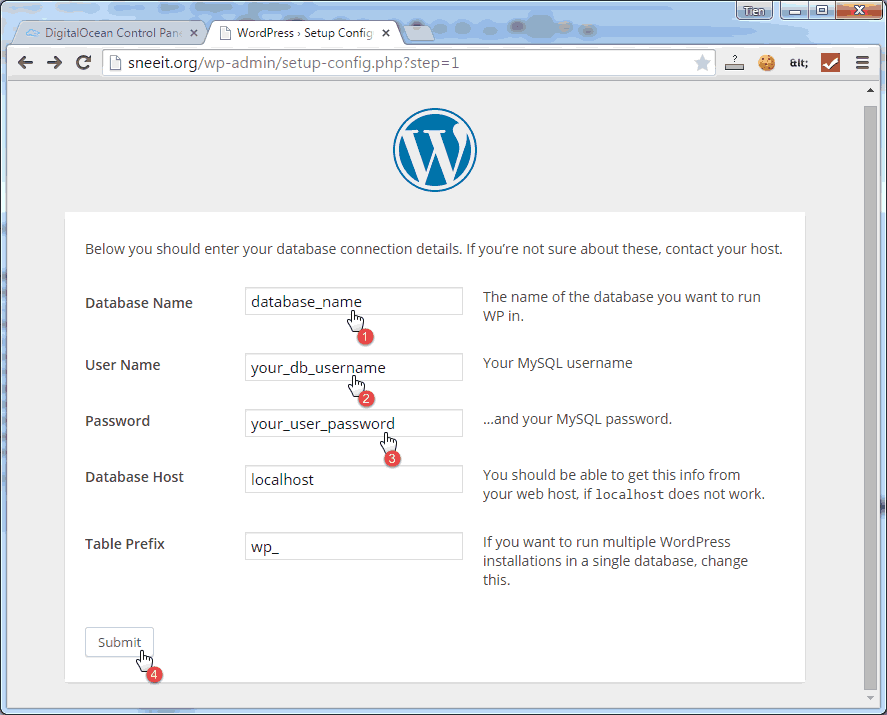
In next screen, click Run the install. And in final screen, input your own information for your site then click Install WordPress.
