Enable Mobile Template
YOU MUST DO THIS STEP FIRST, BEFORE INSTALL THE TEMPLATE TO HELP TEMPLATE EDITOR CAN WORK PROPERLY
As default, Blogger will use its own template for you blog on mobile. So if you want to use Flat News template on mobile devices, please enable it first.
Access your Template menu and click on Gear button of Mobile template.

In Choose mobile template window, check “Yes. Show mobile template on mobile devices.“, then click drop down at Choose mobile template option, choose Custom, then click Save button.

Installation
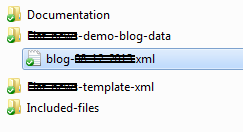
Open your purchase folder, you will see a folder with name ***-template-xml. Open it, and find the newest version with name ***-template-version-X-X.xml.

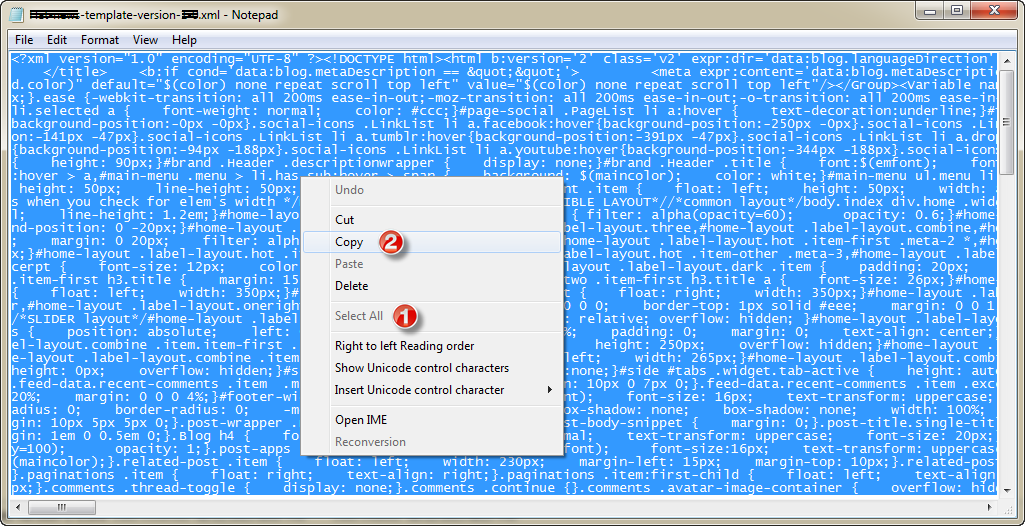
Open the XML file with a text editor (Notepad or something like that). Then select all text and copy (Ctrl+A, Ctrl+C in Window).
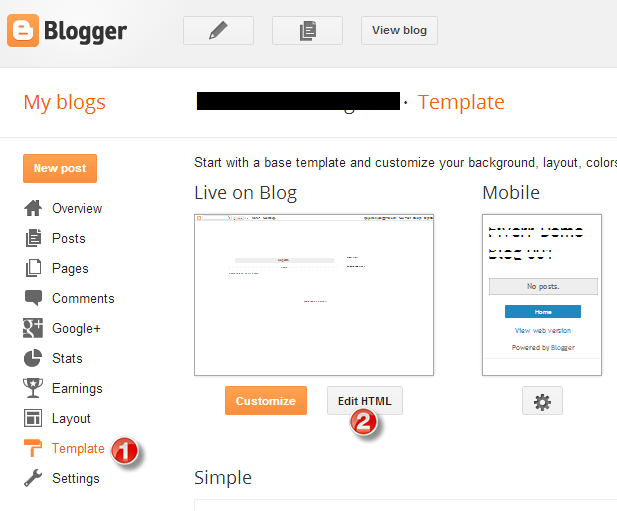
Return to your blog dashboard, access your Template menu, click Edit HTML
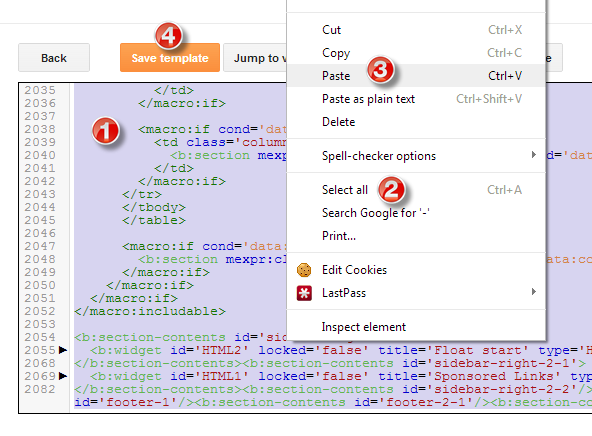
In Editor HTML window, select all old code and paste the new code that you copied from the release file into code field. Then, click Save template.
Upload Blog Data – optional
This step is only for testing blog (if you want test this template before apply to your main blog). Don’t apply this step to your main blog.
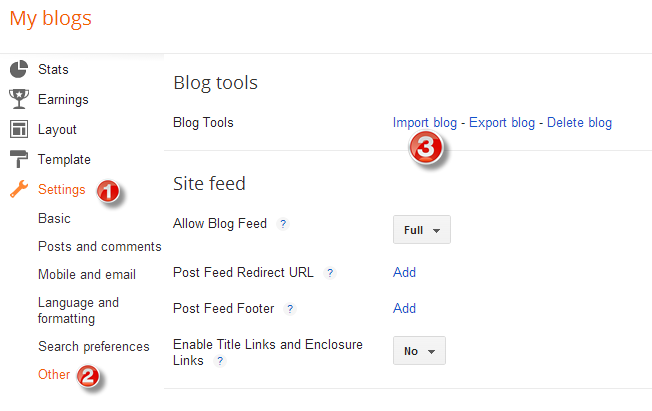
Access your blog Settings / Other. In Blog tools, click Import Blog.
Now, target to your blog data in your purchase folder / ***-demo-blog-data / blog-mm-dd-yyyy.xml
After upload, input captcha, check Automatically publish all imported posts and click Import Blog.
Add Social Links
After install the template, access your blog Layout, and click Edit link on Socialwidget:

In Configure Link List, input your social link in New Site URL and your description in New Site Name, then click Add Link. Repeat again until you input all your links, then click Save.

Upload Logo
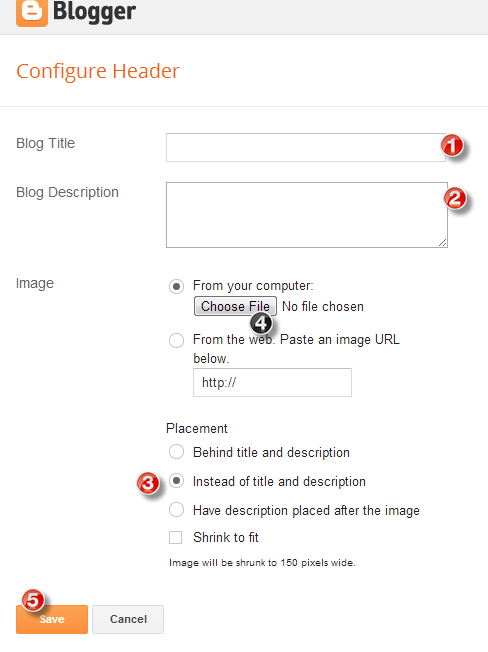
Access your blog Layout > click Edit link on Header widget
In Configure Header window, input you Blog Title and Blog Description. If you want to upload your image logo, make sure checked Instead of title and description, then click Choose File and locate your logo file. And click Savebutton to finish.
Work with Main Menu
Access your blog Layout, you will see a section has grey background, that was labeled with big text “Main menu section“. Under the label is the link “Add a Gadget“, you will use this link to add Link List widgets (or Label widgets) intomain menu, no limit number of widgets.
As default, I had already added 2 widgets into main menu for you: 1 Link Listwidget (with name: Custom Links) and 1 Label widget (with name: Label Links). So in this guide, we will modify these widgest first.
Click Edit link on Custom Links widget.

In Configure Link List window, input your item link in New Site URL field, and item name in New Site Name field, then click Add Link. Example: New Site URLis “https://yourblogurl.com” and New Site Name is “Home”. Do the same steps to add another links. Until added all links, click Save to apply.
Back to your Layout, click Edit link on Label Links widget.
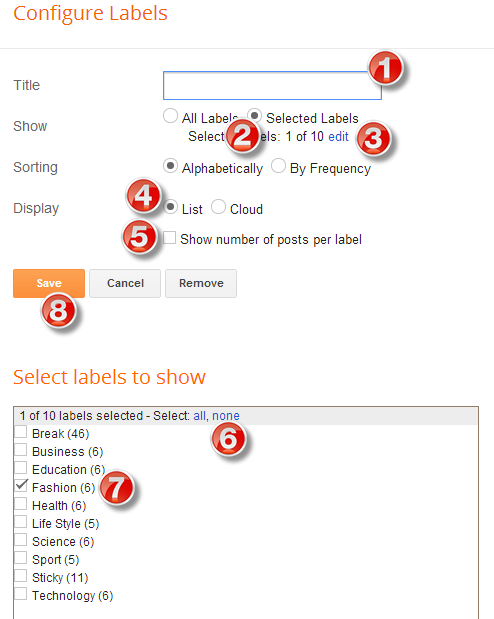
In Configure Labels window, check Selected Labels and click edit. At Displaysection, check List. At Select labels to show section, click none link to deselect all labels, then check into the label names that you want to show on Main menu.
Work with Sub Menu
Access your blog Layout, you will see a section has light yellow background, that was labeled with big text “Sub menu section“. Under the label is the link “Add a Gadget“, you will use this link to add Link List widgets (or Label widgets) into Sub menu, no limit number of widgets.
As default, I had already added 2 widgets into sub menu for you: 1 Label widget (with title: Life Style) and 1 Link List widget (with title: Health). So in this guide, we will modify these widgets first.

The related rule between main menu and sub menu is:
The title of widget in sub menu must be similar with the name of a link (or label)in main menu.
Example: I created a link with name “Home” in Main menu section. If I want it has a sub menu, I must add (or modify) a widget with title “Home” in Sub menu section.
Now, we had 2 widgets in Sub menu section. Just click edit link on them, input data and modify their titles.
Edit Break
Click Edit link on BREAK widget (black background) and choose the labels you want to show on break section.

You can also input another title for this widget.
Work with home design
Flat News supported you build your own home design. In you blog Layout admin, you will see a section has light yellow background that was labeled with name “Flexible Home Layout“. You can add Label widgets to this section by click Add a Gadget link under the label.
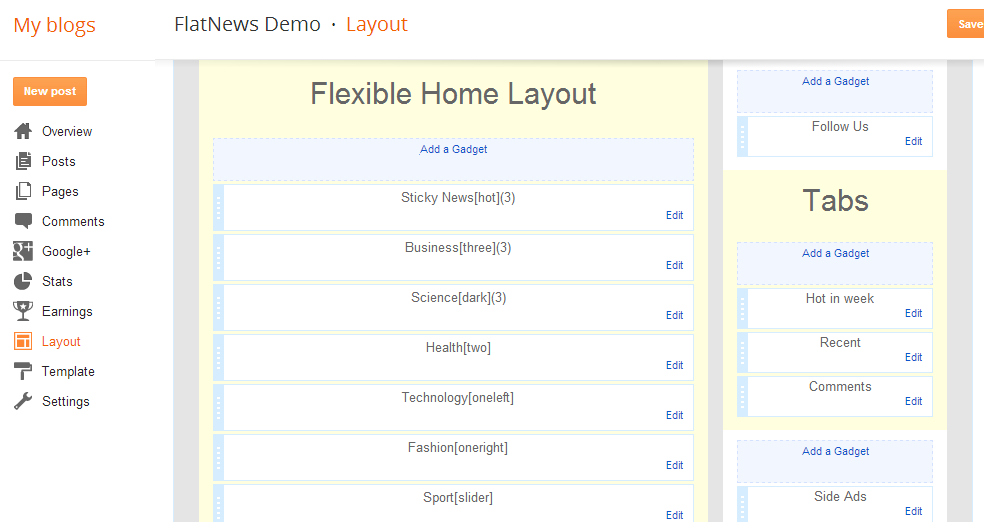
The structure of widget title will decide how the widget will display on home page. Structure of widget title must like below:
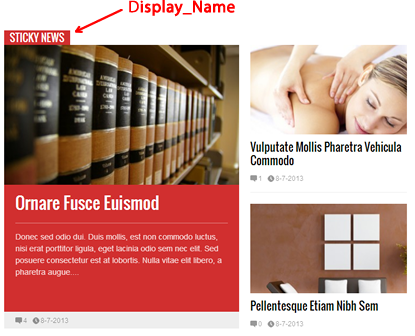
Display_Name[Design_Type](Number_Item)
Display_Name: the name you want to show on home page.
Design_Type: is the design of widget will show on home page. We support 8 types: hot, three, dark, two, oneleft, oneright, slider and combine. All must be lowercase.
Number_Item: this optional, default is 5 items will be displayed if you not use this parameter.
 As default, I already added 8 Label widgets with 8 diffrent types into Flexible Home Layout section. You must click Edit link of each, input title follow the above structure and choose ONLY ONE label that you want to show for that widget.

Input title and choose a label, then click Save. Do the same for others. You can also drag & drop / add / remove widgets to build your own home design.
Use shortcodes
Flat News support three shortcodes as below:
Show recent posts:
<div class="recent-posts"></div>
Show recent comments
<div class="recent-comments"></div>
Show random posts
<div class="random-posts"></div>
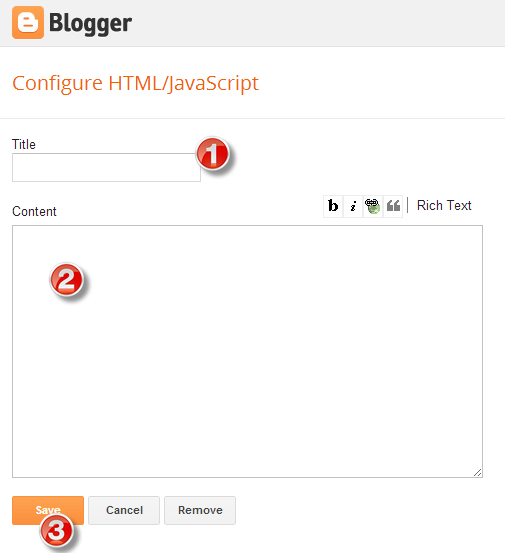
To use shorcodes, you can input them in content of any HTML widgets. As default, I had already added 3 HTML widgets for you in Layout.
 Click Edit link of each. In Configure HTML/Javascript window, input your appropriate shortcode into Content field then click Save.
 To specific number of posts show in shortcodes, you can add “number” attribute, example:
<div class="random-posts" number="3"></div>
Advance Editor
It’s very simple to change advance settings of this template. Access to Templatetab, click Customize button

In Blogger Template Designer window, click Advanced tab, then click an element name that you want to customize and choose all settings you like. When finish, click Apply to Blog

Enable Your Blog to Anyone
Flat News use json feed to display your posts on home page and shortcodes. So you blog must be publised to everyone. Private blogs can not use this template.
To enable your blog to anyone, access Settings menu and choose Basic settings. Then click Edit of Blog Readers option.
 In Blog Readers radio options, choose Anybody and click Save changes.

Enable Full Feed
Access Settings menu and choose Other settings. Click drop-down list at Allow Blog Feed option, then choose Full. After that, click Save settings button at the top right corner.

Enable Search Preference
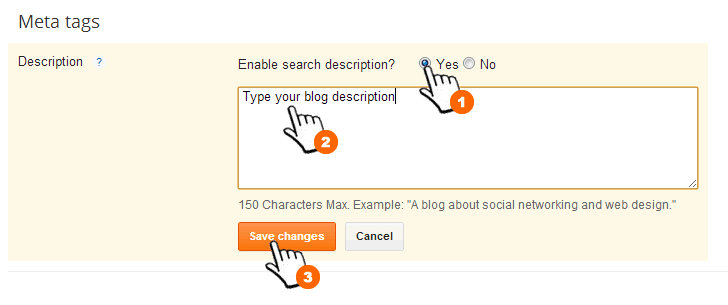
To improve your blog SEO, please enable Blogger Search Preferences. Access your Settings menu, choose Search preferences tab and click Edit link on Meta tags section

Next, check Yes option, then type your Blog Description into the text field and clickSave changes.
Date Time Settings
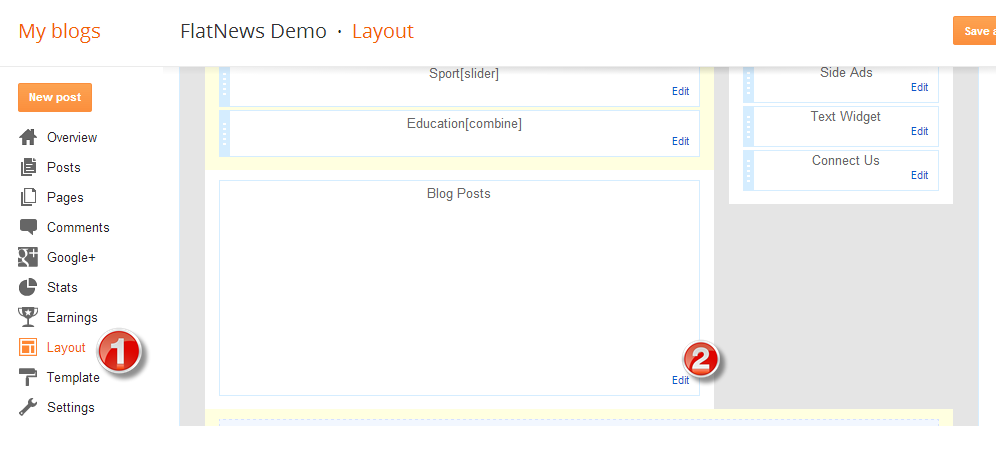
Access Layout. Click Edit link on Blog Posts gadget.
In the Configure Blog Posts window, you will see a field with value “at” (under “Post By” setting). Please change date of this field and your post date will be nice looking.

Comment Picker
Flatnew supported 3 comment systems: default threaded comment of Blogger, Facebook comment and Disqus comment. You can choose to use only one comment system or combine two of them together.
To pick comment systems, access Layout. Click Edit link on Blog Posts gadget.
In the Configure Blog Posts window, you will pick comment systems by input their names in Post page link text field. We support 3 names: default, facebook,disqus. You can combine two of them by separate their names by “-“. Example, combine default with facebook comment system like the demo blog, you can inputdefault-facebook. After input, click Save to enjoy.

If you pick disqus comment system, you must input disqus short name for it. To do that, edit DISQUS SHORTNAME widget in you blog Layout.
 After DISQUS SHORTNAME widget appeared, input your Disqus shortname toContent field and click Save.
 Where you can get Disqus shortname. Access your Disqus Admin and chooseSettings

Then scroll down to Site Indetify, you will see the shortname there.

Break News Control
Flatnew version 1.5 supported you disable, stop or change speed of break news section. But you must touch to code.
To change settings for break news section, access your blog Template, click Edit HTML.
In the Template Editor window, you must click on a code one pick then pressCTRL+F. The search box will show at top right corner of template editor. Type in the search box the query “var TICKER_SPEED” and enter.
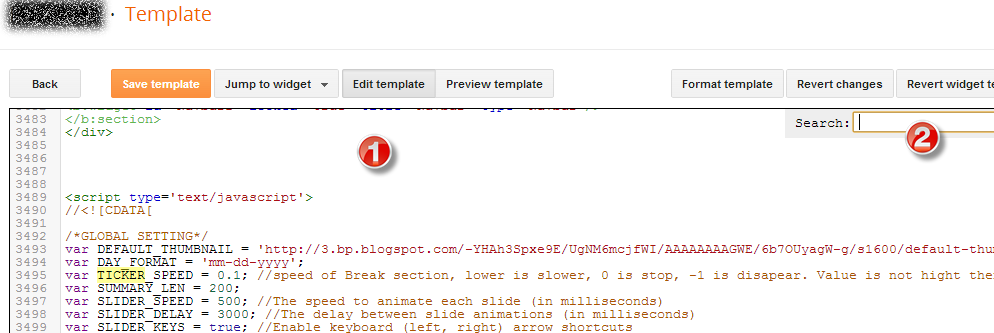
The editor will show the line contains your query. At default, you must see it as below:
var TICKER_SPEED = 0.1; //speed of Break section, lower is slower, 0 is stop, -1 is disapear. Value is not higher then 1
The default speed of ticker is 0.1. Lower value is slower speed. If you change to 0, the break section will stop animation. If you change to -1, this section will be removed. Please remmeber click Save template after change code.
Warning
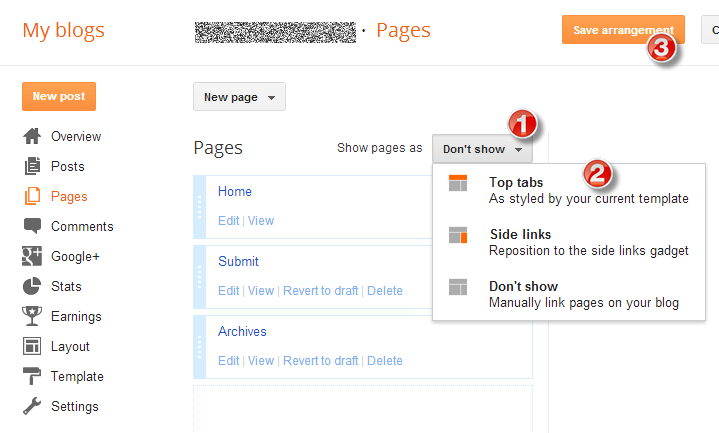
Blogger has some official bugs, so I just let you know to avoid them. One of them are when you click Save arrangement in Pages menu, the page list will auto change to Don’t show status. That’s why please never click Save arrangementbutton.

In case you clicked, you can choose Top tabs from Show pages as list, and clickSave arrangement again.
Add Post Pagination
If you post content is too long or you want to break your post content into multi-chapters, of course, you can do it very easy with this template. When you edit (or add new) a post, just add [next] at any where in you post content when you want to split it to many chapters (sections). Template support unlimited number of [next], you can add many as you want.

Below is the post after I update it with [next] codes.

Use Comment Shortcodes
If you want to insert images or videos in your comment content, you can input like below format:
[img]yourimagelink[/img]
You can input comment message to let your visitor know about this code inSettings / Posts and comments at Comment Form Message option. The comment shortcodes are available with Blogger comment only, not for facebook or disqus.

