As you know, I posted a tip: Contact form for Blogger on static page with css before, and now, I will show you how to do that tip with jQuery. What’s advantage of jQuery? Yes, right question. A big advantage of jQuery than CSS is that it allows you place Contact form any where you want. And this tip is base for my futures about Customize Contact form for Blogger.
Step 1: Add jQuery and Contact widget
Please read “Add jQuery to your Blogger blog“. Remember, if you already added the jQuery before, and now, you add it again, your blog will be broken with javascript error, so please check and follow exactly what I wrote in the above link. Next, please read my Blog post to know how to Add Contact Widget to your blog.
Step 2: Add CSS and Javascript
Please access your blog dashboard, choose Template, then click Edit HTML button. Now, copy and paste the below code before ]]></b:skin>
.ContactForm {
 display: none;
}
.blogger-items-contact .ContactForm {
 display: block;
}
.widget.ContactForm .title {
 display: none;
}
.widget.ContactForm * {
 max-width: 100%;
}
Next, please copy and paste the below code before </body> tag:
<script type='text/javascript'>
//<![CDATA[
$('.ContactForm').appendTo('.blogger-items-contact');
//]]>
</script>
Now, you can click Save template.
Step 3: Add shortcode
Now, you can place below shortcode at any where you want to display contact form:
<div class="blogger-items-contact"></div>
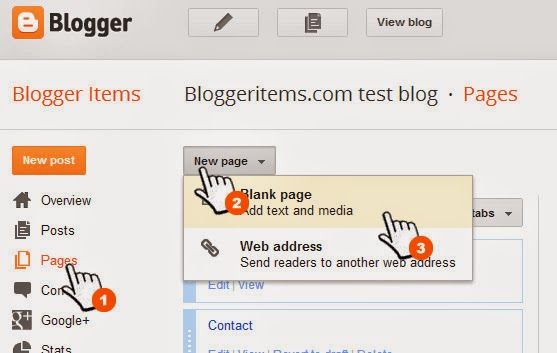
In this example, I will create a static page. Now, choose Pages menu on your blog dashboard, and click New page and choose Blank page.
 |
| Create static page to add Contact form for Blogger |
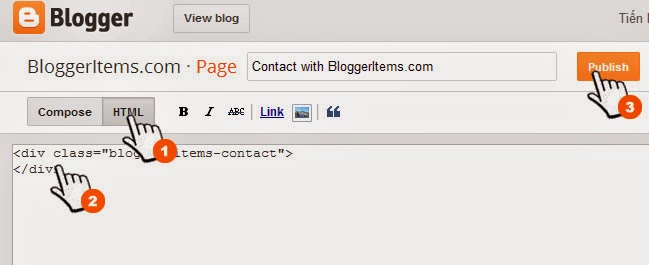
In post editor, switch to HTML mode and paste the above code to content field. Then click Publish.
 |
| Contact Form for Blogger shotcode |
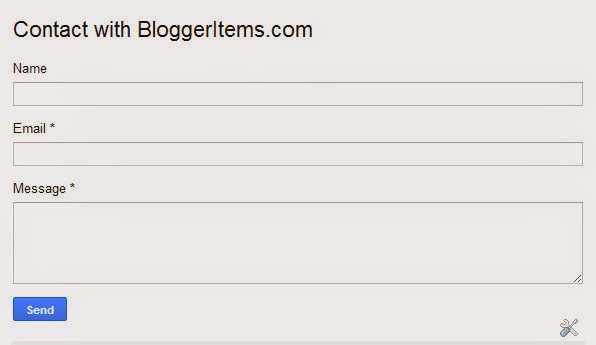
Result of your contact form may be like below:
 |
| Result of Contact Form for Blogger |


